How To Improve Glamour Portrait Photography

Privacy Policy | 11:06 AM |
Individuals are able to reminisce their wonderful and exciting experiences through pictures. The smile and laughter from previous events can surely be remembered instantly, bringing the days where you and your friends had a wonderful or adventurous time together. Glamour photography has also been a huge part of the industry, capturing moments of individuals as they take lovely pictures of them.
No doubt, photography has been a good and amazing hobby or an occupation that individuals love. A simple smile or even a pose can surely make photos better and more spectacular. With this in mind, more and more individuals wish to have their own glamour portrait photography session to give them a wonderful masterpiece that they can display in their living rooms or bed rooms. Therefore, in order to improve the luster and glamour of photos, here are some tips on how to improve your portraits.
Using lighting to your advantage - Visible light from the sun or even from devices and tools are essential to create striking designs in a picture. So, individuals must consider the illumination they need in order to create the best designs as they capture photos. Lighting features can also set the mood of one's photos. From a romantic sunset background, daring pose in the outdoors, or even a simple pose inside your homes can surely be exceptional by getting the best lighting effects for your photos.
Getting that glamour factor - To improve pictures, individuals can be creative by using amazing attires. From vibrant colour outfits, spectacular designs, individuals can improve their looks on the cameras. Individuals can also use items like make-up to increase their beauty. But they must be sure to use sufficient amount of make-ups and styles so that the photo will not be concealing your beauty. For better looks, they can consult their photographers about the best styles for their portrait.
Having the best pose and expressions - Individuals must create that certain appeal in their pictures. It's just like a saying "simplicity is beauty," individuals can instantly create wonderful impressions in a photo by simply making their pose and expressions more natural.
Additional tip: To ensure that you get the best portrait photography, look for a reliable photographer who can assist you in the best ways to capture your photos. This way, you are sure that you can have the best styles and designs that you can cherish for a lifetime.
PMPhoto.com.au is a well-established company that offers amazing photography features for everyone. The company's expertise and knowledge about this field can certainly provide you with amazing benefits that can make your life better.

Article Source: http://EzineArticles.com/7896374
Read more ...

5 Tips For a Successful Street Photography

Privacy Policy | 10:49 AM | | |
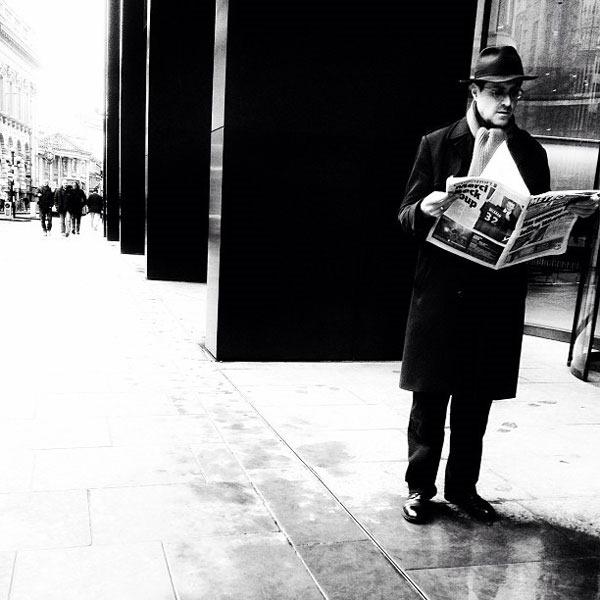
Street photography is just one place where you can use your Canon Rebel digital SLR camera as a imaginative tool. However the camera is just half of the equation. Additionally you have to have a good Canon Rebel lens, and one of the 50mm versions will measure up with regard to that element. There are three possibilities, those being the f/1.2, f/1/4, and f/1.8.
Your choice of which one of these lenses just isn't as critical as it might seem, considering the difference in cost. The f/1.8 will be the cheapest bargain at about $100. Plus the costs rise to around $350 for the f/1.4 and over $1000 for the f/1.2. Granted, the quality of build is definitely different, but the high quality of photography can be extremely close with all three.

There is one more hurdle along with obtaining proper gear. If you're not comfortable talking with strangers, this could be a struggle for you to talk to a complete stranger in order to request permission to get their picture, nevertheless, after you have done it more than once, it is easier. This will be very true when you realize the wonderful results. Street pictures are much more interesting than your standard family portrait. That is, unless of course your Granddad Lamont or Auntie Louise is as fascinating as a lot of the street residents you will come across in the downtown areas and shopping malls.
There are five things that you can use to make it easier to be able to acquire those great shots after you manage the problem of shyness.

1. Never ever venture out without having your camera. We all do it, but it is a better plan to keep on telling oneself that you should never set off without it. After several weeks of bringing the digital camera each time you leave house or office, and it's going to become second nature. Absolutely nothing (well, almost nothing) worse than arriving upon a fantastic photo op on the street when you do not have the photography equipment on hand. And this does not necessarily mean that you have to tote the whole camera bag along with you. You simply need your Rebel and dependable Canon Rebel lens.

2. You want to keep Canon 50mm lens on the dslr camera. There are a couple of advantages of making use of this lens rather than one of many other choices. First, the 50mm is a practically perfect portrait lens because of the great quality and great aperture. And next, it is small and light. It does not wear you out carrying it for a number of hours. Plus, many people will probably be put off by a giant, showy piece of glass.

3. Avoid the use of your flash. You will get natural photos without a flash, and also on the street, this is especially true. You can make use of the large aperture of the 50mm lens to obtain a nice quick shutter speed, and if the brightness is very low, just boost the ISO of the Canon Rebel to speed up the shutter.

4. Be ready before you ask permission. Ensure all of your dslr camera settings are correct previous to walking towards your subject. It could possibly mess up your possibilities when you have to stop and set mess with the camera whilst the individual is awkwardly waiting.

5. Have your model release forms accessible. If you intend to use your pictures in some public location, you will need to obtain a release from your individual. The good news is that there's currently an app for your iPad and the iPhone just for this. It is possible to go digital!
 
 Article Source: http://EzineArticles.com/6801762
Read more ...

Choosing The Best Point Shoot Digital Camera

Privacy Policy | 10:45 AM | |
Digital has changed the course of photography over the past several years. But finding the best point shoot digital camera has now become a very complicated process, that is if it you want to get it right the first time without having the dreaded "buyer's remorse."
Why Buy Digital?
Remember the days of film? It's true, some of us are still using film, and doing it very well. However, there was a day when there was not a choice to go with digital or film. The results of many would-be photographers were pretty dismal and disappointing (yours truly was certainly a victim of disappointing camera experiences).

To get a good picture, the average Joe had to shoot a whole roll of film, take it to the camera lab, wait several days or weeks to get the film processed, then pay for the joy of seeing... what? Sometimes you had a good shot or two, but many of the pictures were simply horrible.
Now, with digital things are totally different. Oh, you can still have plenty of disappointing shots, but there is a MAJOR difference or two. First, you don't have to wait to see how poor the picture is, and second, it costs you nothing to get that preview.
Digital is amazing!
But there is still a dilemma, and it is getting bigger every day. Now that so many people are going digital, there are so many more camera choices. Since most start with basic equipment, the question is, "How do I pick the top digital camera for my needs?" After all, during the days of shooting film pictures, you could just pick up a throw away picture maker from the corner store, but now, you have to pay quite a bit for the privilege of taking those photos.
Discover Your Best Match
Since there is a big investment, you should do some research before buying your point and shoot camera. But that, too, could be a daunting task. Where do you start? Should you trust the 18 year-old clerk at the electronics counter of your favorite super-store? Should you trust the Sunday ads in the local newspaper?
The answer to these two questions would be NO.
So here is a process you can use to assure a pretty good choice right out of the box.
  1. Go to your search engine of choice and type in "top digital camera"
  2. Read as many reviews as you can
  3. Pick out a brand and model that sounds like it might fit your needs
  4. Go to one of the stores in your area and try out the model you chose
  5. Buy the camera
But wait. What if the model is not available? After all, there are so many new models to choose from, not store can possibly carry them all (actually, there are a couple of stores that do, but if you don't live in the largest city in the US, you will be out of luck).
Formula For Success
Fortunately, there is still hope for you to find the best point and shoot digital camera for your needs.
This method has worked for tons of folks. It involves going to some of the most popular online sales sites and searching for the "best sellers" in the category of electronics.
Then look for the models you have already decided would be good for you. Now, here is the most important part. Check the customer ratings. Especially read the ones that give very low ratings. These reviews should give you a good idea if the model you want to buy is a good choice.
You now can do one of two things. Either run down to your favorite store and see if they have it, or click the "buy now" button.
Pretty simple.

Article Source: http://EzineArticles.com/6987559
Read more ...

Learn Digital Photography - Shooting Photos for Facebook

Privacy Policy | 10:35 AM | | | |
One of the things that really irritates me is the number of out of focus and downright terrible photos people post to Facebook. I know that photography is all about creating memories but really, do you want to show just how bad your photos are? So why are so many bad images posted to Facebook? The answer is simple, the point-and-shoot phenomenon. People point and shoot before they think. It's not the type of camera or cellphone but rather the type of person.
So, how can people take better images for posting to Facebook and other social media sites. Follow these simple steps for immediate improvement to your photo taking abilities.
 
1. Think about the lighting

When taking an image have a look at your lighting. Firstly, make sure that there is enough light to take a photo. I know sometimes this is not possible but consider it carefully before you shoot. Secondly, look where the light is coming from. Unless you are trying for a specific effect never place the light behind your subject. The camera will always focus and meter off the brightest area of a scene so your subject will be dark and indistinct. Rather shoot with the light coming from behind the camera over the shoulder of the photographer. Good images need good lighting to get a good exposure.

2. Use your feet

Sometimes it's more important to use your feet before your head. Use them to get in closer. Most of the time photos are being taken with cellphones or point n shoots with either no optical zoom or very little. So the subjects are little blips in the photo. Get close to your subject and fill the frame so your see more of the person or object. Don't use digital zoom as it degrades the image. Try it out and see which image you prefer. I like to see more of the memory I am making rather than all the clutter around scene.

3. Change your angle

Ninety percent of images are shot from in front of the subject approximately 5 feet (1.5m) above the ground. They all look the same, just different people. Change your angle so that you shoot from either low down or high up. Move around from your left to your right so that you aren't directly in front of your subjects. Turn your camera at a forty five degree angle or hold it high above your head or at your waist. Digital photography allows you to review quickly and see if it works.

4. Think outside the box

Try to come up with a composition that is out of the ordinary. Be creative and take time to think about what you are going to shoot before pressing the shutter button. Look at the scene and ask yourself if you have seen a picture like this before. If you have then try another composition or angle. The key is to experiment.

5. Review your images

Before uploading to Facebook, review the images you've taken. Look through them and delete or remove the ones that you aren't totally happy. Rather upload 10 good images than 50 average or bad ones. A little time taken to ask yourself whether you are proud of the image will ensure that your photo gallery stands out from the rest.
 
The bottom line is to learn digital photography and apply it so that you become a photographer and not just a picture taker. A little bit of thought and putting into practise some basic photographic principles will help you create images that you can be proud of. Facebook is there to showcase your images so try to upload only your best ones. Just because people aren't making funny comments about them doesn't mean they aren't thinking them.

Article Source: http://EzineArticles.com/6353645
Read more ...

Learn Digital Photography - 3 Lenses Essential to a Photographer's Bag

Privacy Policy | 10:28 AM | | | |
I am presupposing that you have a standard kit lens that came with your DSLR and it has a zoom with a range of 18-55mm as most do. The lenses listed below would be additions to your kit zoom.

1. The nifty fifty or 50mm f1.8
Despite the fact that most cameras come with a zoom kit lens in the range of 18-55mm, I always advise buying a camera body and choosing the lens that most suits you. The kit lenses that come with a camera are most times of dubious quality. In order to keep the entry level cost down an inexpensive lens needs to be sold with the camera. So why is the 50mm prime lens a first choice? Firstly, it's a better build quality lens than the kit lens and secondly, it's reasonably priced. What I like about it is the f1.8 aperture. This gives you the option of shooting in low light conditions with such a wide aperture and the depth of field at f1.8 is great. You don't really need the kit zoom lens because at this focal lengths you can use your feet to zoom in or out.
2. An all-purpose zoom in the range of 70-300mm
Most photographers want the ability to zoom despite the fact that in most situations you can use your feet unless of course you are shooting snakes, crocodiles or lions. This is a useful lens for an amateur photographer especially with the crop factor on most DSLRs that aren't full frame. This can give you an extra 60% when zooming and it brings the 300mm focal length to the equivalent of 480mm which is useful when shooting wildlife such as birds. There are a number of quality lenses in this range at reasonable prices. Remember that the quality of the glass is important and you will always get what you pay for.
3. A wide angle lens in the 17-85mm range
Wide angle lenses are great if you're into landscape photography or need to shoot indoors where space is limited. Again the quality of the glass is going to be important especially when you are shooting in close confines. The reason I place this as the third in my list is that most beginners don't really find a wide angle lens an essential part of their kit. It's a more specialist lens but if you can afford one it's great to have it in your bag.
It would be great to be able to buy all three of these lenses with your camera but most of us aren't able to do this. Use these three choices as a guideline for growing your kit. They aren't set in stone so if you want to get a zoom first and then a 50mm it's up to you. Or if you know that you really love landscape photography then start with a wide angle.

These are my suggestions based on my experience and the photos I enjoy shooting so yours might vary. Once you have these lenses in your bag you can find what you really enjoy and buy a specialist lens for that particular genre. Remember the quality is in the glass so look at whatever lens you buy as an investment in your photographic future. Happy shooting!

Article Source: http://EzineArticles.com/7406693
Read more ...

Learn Digital Photography - Portrait Photography Tips

Privacy Policy | 10:16 AM | | | | |
Learn Digital Photography - Portrait Photography Tips
Portrait photography was once the realm of the professional portrait photographer but now most amateur photographers can shoot a reasonable selection of portraits without much experience. This is because digital allows you to review your images immediately and make any colour or lighting corrections. So how can the average amateur take good quality portrait photos. Here's how.
The bottom line for any budding portrait photographer is good basic photography gear. If you have this then you are on your way to good images.
 
1. Relax your subject

The difference between a professional portrait photographer and an amateur can be seen immediately by how relaxed the subject is in the photo. Experienced photographers will put a subject at ease very quickly. Without the ability to do this you won't progress much further in your portrait photography. So take the time to master this before attempting any shooting of your subject. This can be done by an informal chat before the shoot, allowing a child the freedom to play with interesting toys or just playing around with your camera and allowing the person to shoot some images of you or the surroundings. Develop your own techniques to relax them that work for you and your subject. There is one problem though, if you aren't a people person you are going to struggle in this field as it is focused people. So, either find a way to become more outgoing or choose another genre of photography.
2. Use props
This can be a contentious issue as some photographers don't like using props. I say whatever works, use it. The bottom line is that you want a great image at the end of the shoot and however you do it is okay. Now, it will be difficult to keep a supply of props for every kind of person so doing a bit of research prior to a shoot is essential. Ask the subject to bring in their favourite things, work or play items or just something that they'd like in the image. Children make this easy as they always have something that they are interested in or like. Before you jump to conclusions, these are not to be included in all the photos and perhaps none of them. They are there to relax your subject and get them in the zone. Of course some may be really appropriate like an Ipod for a teenager or a book for an elderly person. One of the best personal portraits I ever shot was of my elderly grandmother looking up from the cowboy book she was reading.

3. Change your perspective

By simply changing the position you are shooting from will create a different image altogether. Don't be afraid to vary your height or angle. Shoot from low down looking up. With children you need to get down to their level and make sure that the camera is at the same level as their eyes and they are looking directly into it. So often images of kids are taken from above their eye level and they are just not as effective so remember this point.

4. Get in closer

We all tend shoot from too far away and rely on zooms. By shooting just part of a subject's face you immediately change the whole character of the image. Eyes of course are the most effective as they are the window to the soul, as the old adage goes. Remember that portraits are shot to make memories and a closer image allows you to see more of the person which is important years in the future.

5. Lighting

I can't even begin to scratch the surface of this subject as books are written every year on lighting. What I would recommend is that you get a good flash with a diffuser to break down any harsh lighting. Reasonably priced lighting kits are available for the beginner so explore online and in your local photography shops for entry-level gear. And, don't be afraid to explore natural lighting, another huge subject.
These are just a few tips that if put into practise properly and regularly will help you achieve a level of excellence very quickly. Happy shooting!

Article Source: http://EzineArticles.com/7424912
Read more ...

7 Types of Trick Photography and Special Effects

Privacy Policy | 8:28 PM | |

With all of the different photo editing software and applications readily available today, it is easier than ever to add great special effects and trick photography illusions to your favorite photos to give them an "otherworldly" appeal.

Several other stunning effects can be achieved by making adjustments to shutter speed. By using these tips even the most amateur photographer can make their photos look professional.


Tip # 1: Light Painting Techniques

By reducing the shutter speed on your camera and using it in a night setting along with a flashlight, you can create some really interesting and cool special effects.
Simply wave the flashlight around, aiming it at the subject of the photograph, as well as occasionally aiming it directly at the camera lens. What you will end up with will appear as if the light is painted throughout the photo.

Tip #2: Light Drawing Techniques

Light drawing is similar to light painting, but differs because the design is more specific.
Keep the camera about fifteen feet away from the subject and set the shutter speed to around 30 seconds. Using a flashlight, or other light source, begin making your pattern or design.
If you are drawing something simple such as a basic shape, you may wish to go over the pattern several times. If it is more complicated, stick to going over the pattern only one time fairly slowly to get the desired effect.

Tip #3: Using Flash Stencils in Photography

Using a flash stencil in your photos will give you a cool special effect. For this, you will need a box, a piece of sturdy white paper on which to make a stencil, or a pre-made stencil, and an external flash source for light.
Cut an area out of the box so that you can place your stencil in it. Tape the stencil into place. Then, on one side of the box, cut a hole just large enough for your external flash to fit into. This will cause the flash to illuminate the stenciled area.
Set your shutter speed to around 30 seconds, and then move about within the area you would like the stenciled image to appear. Remember not to stand too still or stay in any one spot too long, or partial images of your body may end up in the photo along with the stencil.

Tip #4: Motion Blur Effects

Motion blur images are one of the most popular of types of trick photography and special effects available. To capture the essence of motion, while at the same time having a subject in the photo appear focused, there are a few tricks you can use.
One option is to freeze the entire image by shooting with a shutter speed of about one thousandth of a second. Another way to achieve motion blur is to pan your subject, following them while everything else around you continues to move. Another option is to have the subject remain still as you focus on them and things blur past around them.

Tip #5 Double Exposure Special Effects

When attempting a double exposure effect, two slightly underexposed images must be taken. These images will then be combined to create one double exposure image.
The superimposed images will overlap in the finished product, so try to get them to match so that everything looks uniform and natural, aside from the subject matter that you desire to look slightly unnatural and stands out.

Tip #6 HDR Photo Effects

HDR stands for High Dynamic Range and involves taking one or a series of images and combining or adjusting them after processing. Typically, this works by using three images of the exact scene, all taken using different shutter speeds.
Using special software, you can then combine these images to enhance the highlights and details, such as shadows. This helps the photographer to achieve the full effect of the scene as the naked eye would actually see it.
Tip #7 The Bokeh Effect
As the last of our list of 7 types of trick photography and special effects, this one can be achieved by using a DSLR camera and large aperture settings. Set the camera to A or AV mode and to use a low f-number (lower f-stop = larger aperture) to obtain a shallow field depth.
Using a fixed focal lens will also help in creating the Bokeh effect. Keeping the subject very close to the lens and the background as far away as possible works to create the most effective Bokeh shot.
There is also good news for the point and shoot camera user, as photo effect programs and even downloadable apps for an iPhone or other mobile device are available to give you the Bokeh effect without all the extra work or special equipment.
All of these methods will give you the soft, circling patterns of light that Bokeh is known for.

Conclusion

Many of these methods of trick photography can be achieved by simply adjusting the shutter speed. The shutter controls how much light is allowed into the camera, which can greatly effect how the photograph is exposed, as well as the ultimate outcome of the shot.
It is important to keep in mind that you don't have to spend a lot of money to make your ordinary photographs look extraordinary.
Eric Cross is a budding photographer who balances his time taking photographs with time spent writing about taking photographs.

Article Source: http://EzineArticles.com/7786131
Read more ...
Twitter Delicious Facebook Digg Stumbleupon Favorites More

Search

Powered by Blogger.